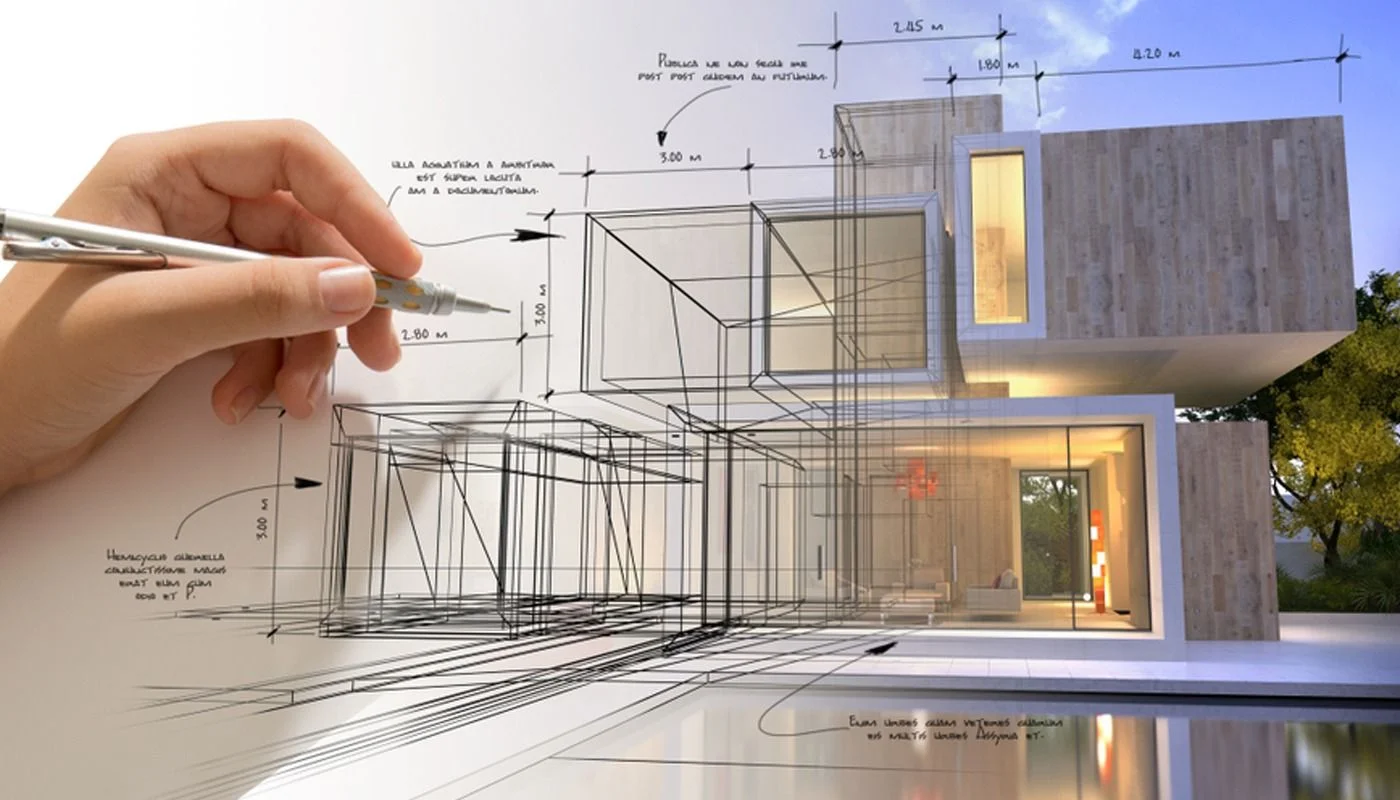
A quality architectural render isn’t improvised. Behind a convincing final image lies a rigorous process — exchanges, iterations, and technical decisions made at the right moment. Understanding this process also means understanding why some renders reach a level of excellence — and why others, rushed or badly framed from the start, end up disappointing despite hours of work.
Here are the six steps that structure every project at Parallax Stud.io.
1. Brief and project analysis
It all starts with a conversation. Before modeling anything, you have to understand what the project needs to say — and to whom. A render meant for a competition jury doesn’t meet the same requirements as a real-estate marketing visual or a client presentation board in the sketch phase.
This briefing phase covers several dimensions:
- The nature of the project — program, area, location, urban or natural context
- The expected deliverables — number of views, formats, resolutions, deadlines
- The narrative intent — what atmosphere, what time of day, what season, what use we want to illustrate
- Visual references — examples of renders the client likes, even from other projects, are invaluable for aligning expectations
A well-run brief avoids the majority of misunderstandings that arise during production. It’s a step some clients tend to want to shorten — and that’s often where projects go off the rails.
2. Gathering and analyzing technical data
Once the brief is approved, it’s time to assemble the technical elements needed for production. Plans, sections, elevations, CAD or BIM files, material references, detail sheets — the more complete and up-to-date the data provided, the more precise and faithful the modeling will be to the real project.
This step is often underestimated by clients who send partial files or earlier versions of the project. In architectural visualization, the quality of the final render is directly tied to the quality of the input data. An approximate plan produces an approximate model, no matter the studio’s technical mastery.
The most common and most usable formats are DWG (AutoCAD), Revit, or SketchUp files, together with material data sheets and photographic references of the existing context.
3. 3D modeling
This is the project’s virtual construction phase. The modeler rebuilds the building in digital space from the data received — volumes, façades, joinery, architectural details — ensuring geometric coherence and correct proportions.
The precision of this step determines everything that follows. A poorly built model — open angles, flipped surfaces, incorrect scales — generates visual artifacts impossible to fix in post-production. Conversely, a clean, well-organized model lends itself easily to the last-minute changes that are inevitable in any architectural project.
Depending on the project’s complexity, this phase can represent between 30 and 50% of total production time.
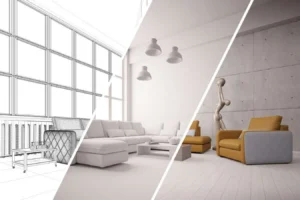
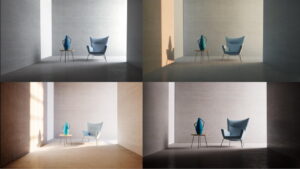
4. Staging: light, materials, and environment
This is where the project comes to life. Once the model is built, the staging work consists of dressing the surfaces, setting up the lighting, and composing the building’s environment.
Materials are applied with their real physical properties — reflection, roughness, transparency, translucency. Raw concrete doesn’t behave like smooth concrete. Laminated glazing doesn’t reflect like plain clear glass. This level of precision is what separates a credible render from a generic image.
Light is then set up according to the narrative intent defined in the brief — sun position, orientation, weather, artificial lighting for night or interior scenes.
The environment completes the scene: vegetation, street furniture, roads, adjacent buildings, people. Resources like Quixel Megascans or D5 Render’s native libraries make it possible to populate these environments with high-resolution elements that reinforce the overall realism.
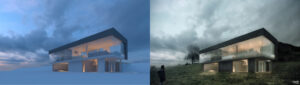
5. Rendering and interim validation
Before launching the final high-resolution renders — a process that can take several hours depending on scene complexity — an interim validation is submitted to the client. These low-resolution previews confirm the viewing angles, lighting atmospheres, and material choices before committing the final compute time.
This step is crucial. It avoids discovering at the end of production that an angle is wrong, that a material was misunderstood, or that an element of the project has changed since the work began. Interim validation isn’t a formality — it’s a safety net for client and studio alike.
6. Post-production and delivery
The raw images from the render engine are rarely delivered as-is. Post-production is the final layer of work that turns a technical render into a communication image.
In Photoshop or Lightroom, we work on color grading, contrast, depth of field, and atmospheric effects — light haze, ground reflections after rain, light halos. We also add the overlay elements that weren’t integrated directly into the 3D scene: some figures, foreground foliage, graphic elements.
Delivery is in the formats agreed in the brief — high-resolution JPEG, TIFF, PNG with transparent background depending on the intended uses — together with an archive of the project to allow later modifications if it evolves.
A process in service of the result
These six steps aren’t a bureaucratic constraint — they’re the guarantee of a controlled result and a smooth collaboration. Every project is different, and timelines vary with complexity, number of views, and the responsiveness of exchanges. But the structure stays the same: rigorous brief, complete data, progressive validation, polished delivery.
At Parallax Stud.io, every 3D rendering project follows this process, from the first conversation to final delivery. Contact us to start your project.
Parallax Stud.io is a French-Moroccan architectural visualization studio based in Rabat. We help developers, architects, and real-estate agencies bring out the visual value of their projects.